Quick Start
Complete CueMate installation and deployment in 5 minutes.
1. System Requirements
- macOS 13.0+ or Windows 10/11 (64-bit)
- 4GB+ RAM
- 10GB+ disk space
2. Download Installation Package
2.1 macOS
CueMate offers two types of installation packages:
- Online Package (~670MB): Faster download, requires network to pull Docker images during installation
- Offline Package (~4.4GB): Larger size, ready to use without network
Choose the installation package based on your chip type:
| Chip Type | Online Package | Offline Package |
|---|---|---|
| Apple Silicon (M1/M2/M3) | CueMate-v0.2.0-macos-arm64-online.dmg | CueMate-v0.2.0-macos-arm64-offline.dmg |
| Intel | CueMate-v0.2.0-macos-x64-online.dmg | CueMate-v0.2.0-macos-x64-offline.dmg |
TIP
For first-time installation, the Offline Package is recommended as it includes all dependencies without additional downloads.
Download Links:
- Baidu Netdisk: https://pan.baidu.com/s/15jwZHy8YkDa4cEDLIYRo9Q?pwd=3477 (Extraction Code: 3477)
- GitHub Releases: https://github.com/cuemate-chat/cuemate/releases
2.2 Windows
CueMate offers two types of installation packages:
- Online Package (~700MB): Faster download, requires network to pull Docker images during installation
- Offline Package (~4.5GB): Larger size, ready to use without network
| Architecture | Online Package | Offline Package |
|---|---|---|
| x64 (AMD64) | CueMate-v0.2.0-windows-x64-online.exe | CueMate-v0.2.0-windows-x64-offline.exe |
| arm64 (ARM64) | CueMate-v0.2.0-windows-arm64-online.exe | CueMate-v0.2.0-windows-arm64-offline.exe |
TIP
For first-time installation, the Offline Package is recommended as it includes all dependencies without additional downloads.
Download Links:
- Baidu Netdisk: https://pan.baidu.com/s/15jwZHy8YkDa4cEDLIYRo9Q?pwd=3477 (Extraction Code: 3477)
- GitHub Releases: https://github.com/cuemate-chat/cuemate/releases
3. Run Installation
3.1 macOS Installation
- Double-click the downloaded
.dmgfile - Run the CueMate installation wizard
- Follow the wizard prompts to complete the 8-step installation process (about 3-5 minutes):
- 1.Welcome → 2.License Agreement → 3.Install Location → 4.Disk Space Check
- 5.Docker Check → 6.Port Check → 7.Image Loading → 8.Complete (Launch App)
Notes:
- The installation wizard will automatically detect and install Docker Desktop (if not installed)
- The installation process will automatically load and start all backend services
For detailed installation steps and common issue resolution, please refer to the macOS Installation Guide.
3.2 Windows Installation
- Double-click the downloaded
.exefile - If you see a SmartScreen prompt, click "More info" → "Run anyway"
- Run the CueMate installation wizard
- Follow the wizard prompts to complete the 10-step installation process (about 5-10 minutes):
- 1.Welcome → 2.License Agreement → 3.Deploy Mode → 4.Install Location
- 5.Disk Space Check → 6.Docker Check → 7.Port Check
- 8.Image Loading → 9.Install Client → 10.Complete
Notes:
- The installation wizard will automatically detect and install Docker Desktop (requires WSL 2 support)
- It is recommended not to install on the C: drive to avoid system disk space shortage
For detailed installation steps and common issue resolution, please refer to the Windows Installation Guide.
4. Verify Installation
After installation is complete, the installation wizard will prompt you. Click to launch the CueMate application.
4.1 Check Service Status
Go to the "Docker Monitor" page (Top dropdown menu → Docker Monitor) and confirm all 6 services show as "Running" (green label):
- cuemate-web - Main Window Service
- cuemate-web-api - Backend API Service
- cuemate-llm-router - LLM Router Service
- cuemate-rag-service - Knowledge Base Retrieval Service
- cuemate-asr - Speech Recognition Service
- cuemate-chroma - Vector Database
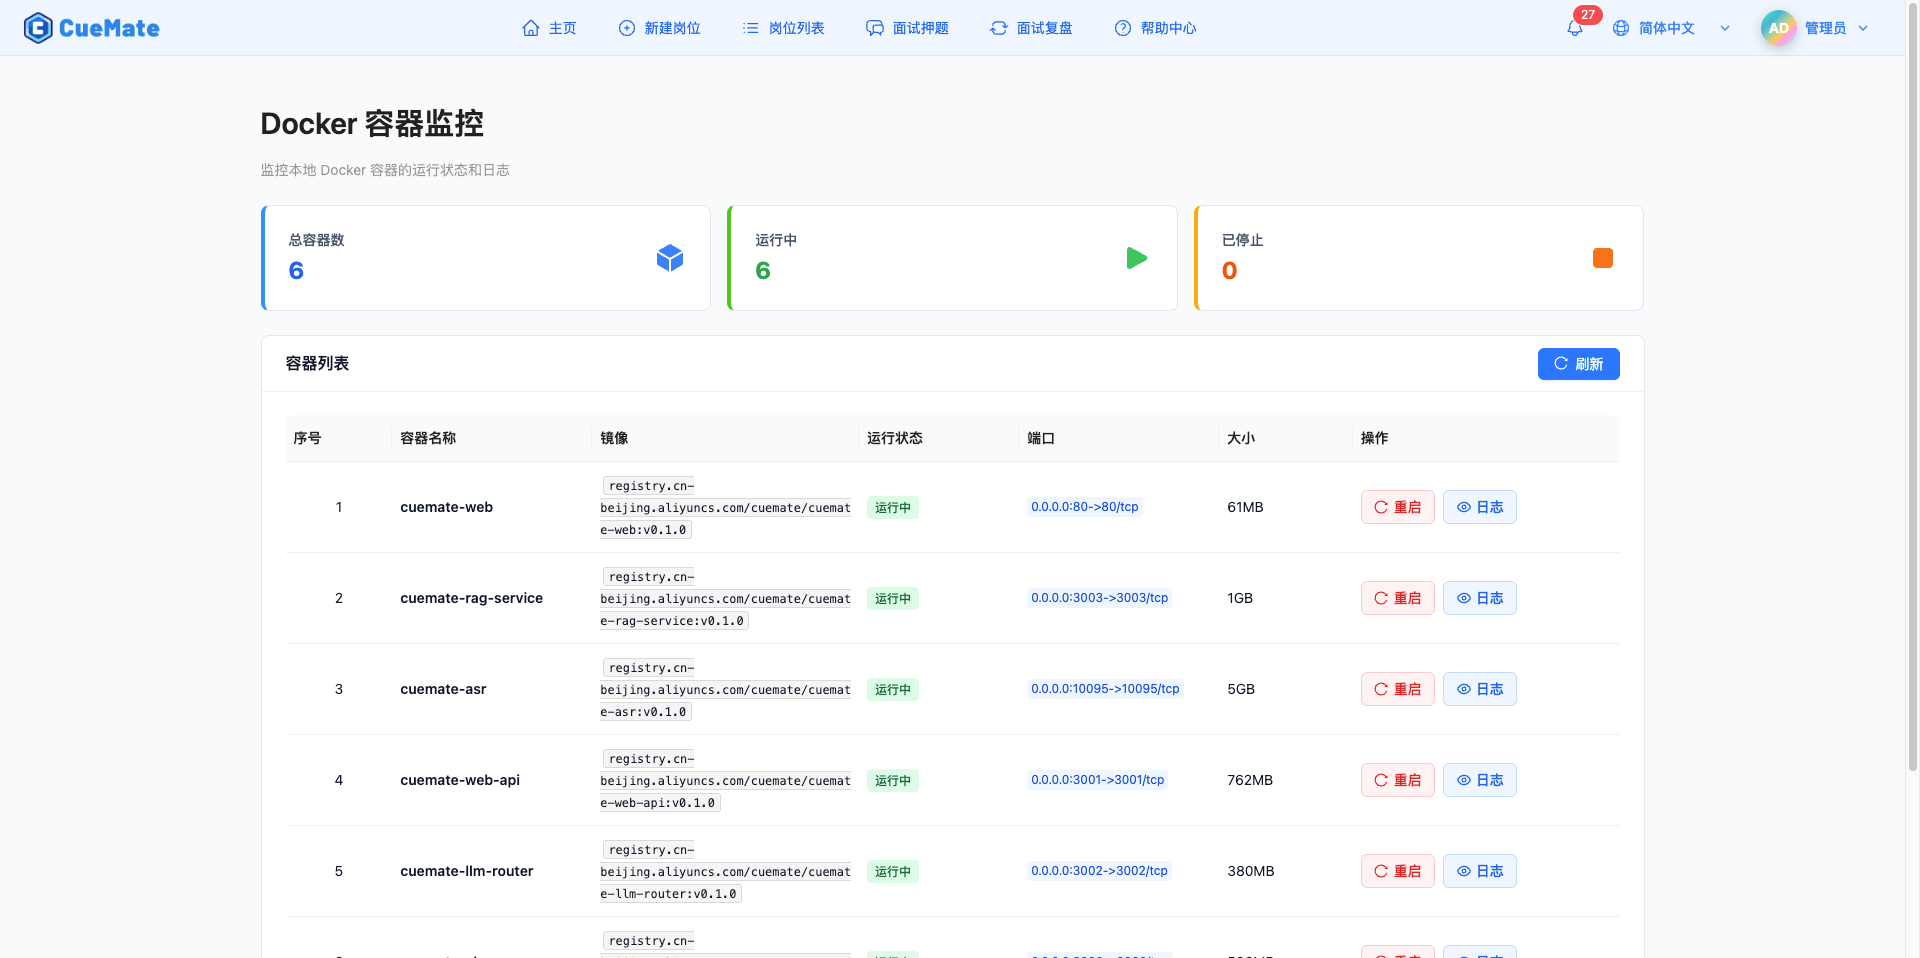
If any service is abnormal:
- Click the "Logs" button for the service to view error messages
- Click the "Restart" button to attempt repair
- If the issue persists, please refer to the Service Management documentation
5. Installation Complete
CueMate has been successfully installed. Launch it through the installation wizard or click the CueMate icon in Launchpad.

After launching, the login interface will appear:

Built-in Account Information:
- Username:
admin - Password:
cuemate
6. Next Steps
First-time Configuration: Configure AI models, test speech recognition, etc. See individual feature documentation
- Configure AI Model: See Model Settings documentation
- System Settings: See System Settings documentation
- Voice Test: See Voice Test documentation
Version Upgrade: Update online through the version management feature. See Version Upgrade documentation
Service Management: View service status, restart services, view logs. See Service Management documentation
Uninstall Application: Completely uninstall CueMate. See Uninstall Guide documentation
7. FAQ
7.1 Installation Wizard Won't Open
macOS: If prompted "from an unidentified developer"
- Open "System Settings" → "Privacy & Security"
- Find the blocked prompt, click "Open Anyway"
Windows: If blocked by SmartScreen
- Click "More info" → "Run anyway"
7.2 Docker Desktop Not Installed
The installation wizard will automatically detect Docker Desktop:
- If not installed, it will install automatically
- Or download it yourself: https://www.docker.com/products/docker-desktop/
- After installing Docker, return to the installation wizard and click "Re-detect"
7.3 Port Occupied
The installation wizard will detect port conflicts:
- It will display the program name occupying the port
- Click "Auto Resolve" to close the occupying program
- Or manually close the program and click "Re-detect"
7.4 Image Loading Failed
Possible causes:
- Network connection interrupted
- Docker service abnormal
- Insufficient disk space
Solutions:
- Check network connection and Docker status
- Confirm sufficient disk space
- Click "Retry" button to reload
For more installation issues, please refer to the FAQ section in the macOS Installation Guide or Windows Installation Guide.
8. Get Help
- Check FAQ
- Visit GitHub Issues
- Email: nuneatonhydroplane@gmail.com